As a company grows, company data also expands, and so we need more space to save our company data files safely. In that scenario, the businesses must migrate their company file data from one accounting software or version to another. During that stage, QuickBooks Data Migration Services comes into play. These services help users to repair broken files and transfer old versions of QuickBooks to their latest version.
Moreover, you can utilize them to shift from QuickBooks Desktop to Online or from QuickBooks to any other accounting software. However, to gather more details on converting QuickBooks Desktop to Online, continue reading this post.
Do you want instant help to use the QuickBooks Data Migration Services? In that scenario, you must reach out to us by dialing +1-833-460-2030, and our experts will handle the situation professionally.
Scenarios When QuickBooks Data Migration is Required
As we all know, with the expansion of the business, the company file data will also increase automatically. So, to store that data, you must require additional space; otherwise, it starts hampering the performance of your system. Especially if you are a QuickBooks Desktop user, then it is the best option to migrate to QuickBooks Online.
Apart from this, there are several other circumstances due to which your migration is required. Below, we have elaborated on all of them. Check them out.
- Company File Data Issues:- In case you find that there are some issues with the company file data and it can’t be recovered. In that scenario, the best thing you can do is migrate all the latest data to a new file.
- Problem With File Size:– If your QuickBooks company file is too large and it is taking too much time to open on your device. In that circumstance, it is best to either keep the important data or remove the unnecessary one. Otherwise, it would be great if you switch to QuickBooks Online.
- Using Different Accounting Software:- If you want to migrate from QuickBooks to any other accounting software.
- Switch Between The Versions:- Switching from the QuickBooks Desktop Pro or Premier to QuickBooks Online, the migration is required.
How Can You Figure Out Whether You Can Migrate to QuickBooks Online?
The QuickBooks company file carries all the details regarding inventory, employee and accounting records, customer lists, etc. As the business expands, eventually, the size of the company file expands.
For instance, if you have a large company, migrating to QBO isn’t a good idea as it involves more complex data. However, if you are running a small or medium-sized business with QuickBooks Desktop Pro, Premier, it is great to migrate the data as it might involve less complexity.
Let’s have a look at the features of both QuickBooks Desktop and QuickBooks Online to determine which accounting solution is best fit for your company. Also, it will help you decide whether you must conduct QuickBooks Data Migration Desktop to Online.
QuickBooks Desktop
The users accessing the QuickBooks Desktop require additional storage space to keep the backup of their company data. Moreover, it can only be used by one user with one single subscription. Also, the users have to schedule regular backups to keep their data secure. It doesn’t guarantee data safety as data is saved in local files and discs, and if it gets damaged or corrupted, you might face data loss.
QuickBooks Online
The benefit of using QuickBooks Online is that it is a cloud-based software, so you don’t require more space to keep the backup on the file. You can access your data file from anywhere with a stable internet connection. Moreover, this application is supported by multiple users. Another best thing is that your data remains safe on the cloud, and there’s no need to create the backup manually.
Prerequisites Required Before You Migrate From QuickBooks Desktop to Online
Before you begin the conversion process, ensure that all your company file data migrates properly. So, make sure everything is set to migrate.
1. Conduct the Backup of Your Company File
For the users of QuickBooks Plus Desktop 2023, it is mandatory to schedule the backup of their data files. However, in QuickBooks Online, all the data is stored on the cloud, so you won’t have to create the backup manually.
- If you are accessing the multi-user mode, move to the File menu and tap on Switch to Single-User mode.
- After this, again hit the File menu > Create Backup > Local Backup.
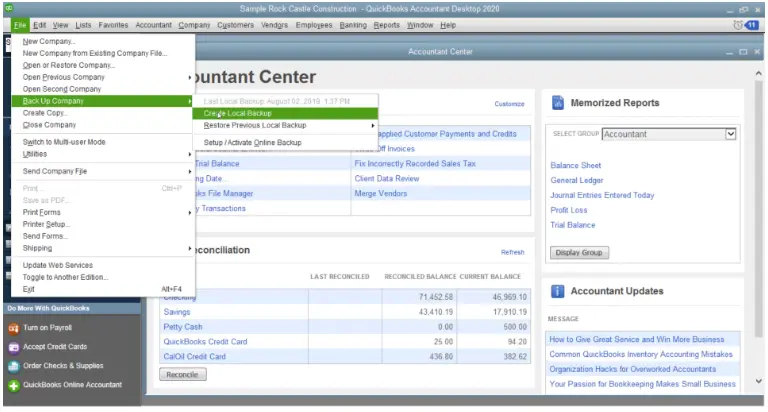
- Thereon, choose the Local Backup option and hit the Next button.
- Under the Local Backup Only section, click Browse and select the file’s storage location.
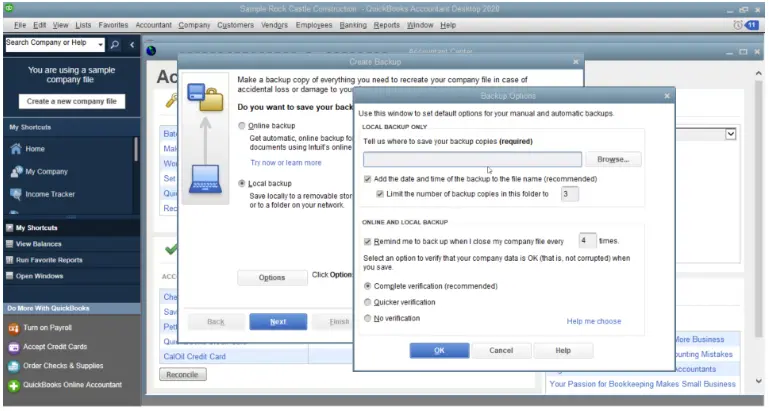
- After that, you have to run the test to check that your backup file is accurate before you restore it.
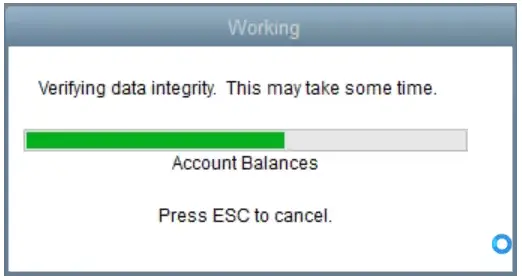
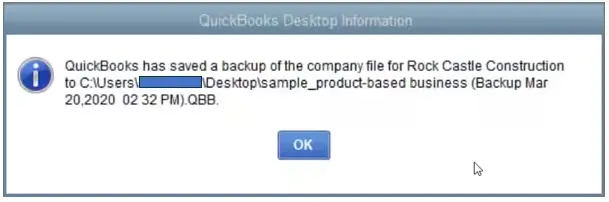
- Later on, hit the OK button if everything is perfect and then choose Save it Now > Next button. As a result, a confirmation message displaying that the backup process is over will be displayed on the screen.
2. Install the Latest Updates of QuickBooks Desktop
Another important thing is to ensure that the QuickBooks Desktop you are using is updated to the recently launched version.
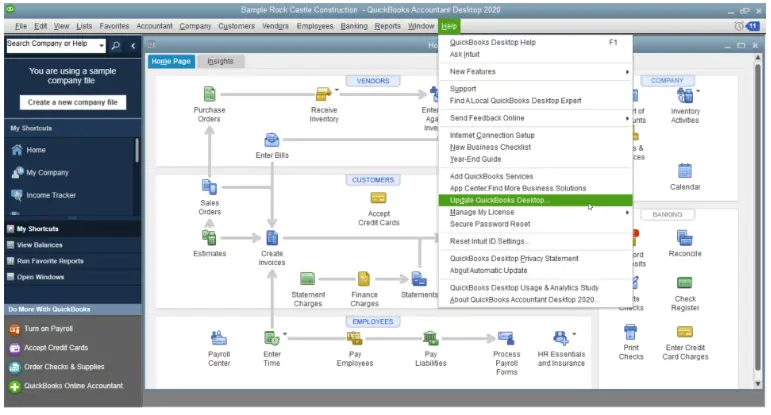
- To update the QuickBooks Desktop, go to the File menu and select ” Switch to Single-user mode “ if working in a multi-user environment.
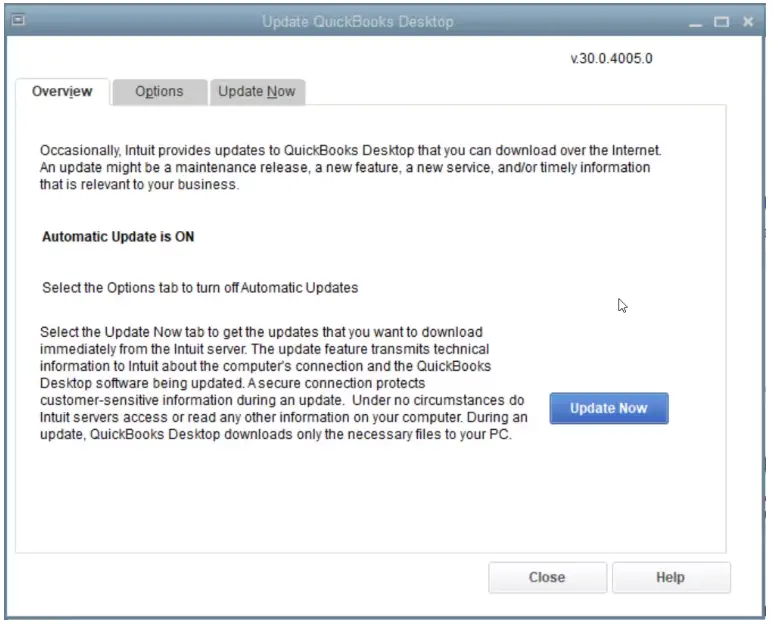
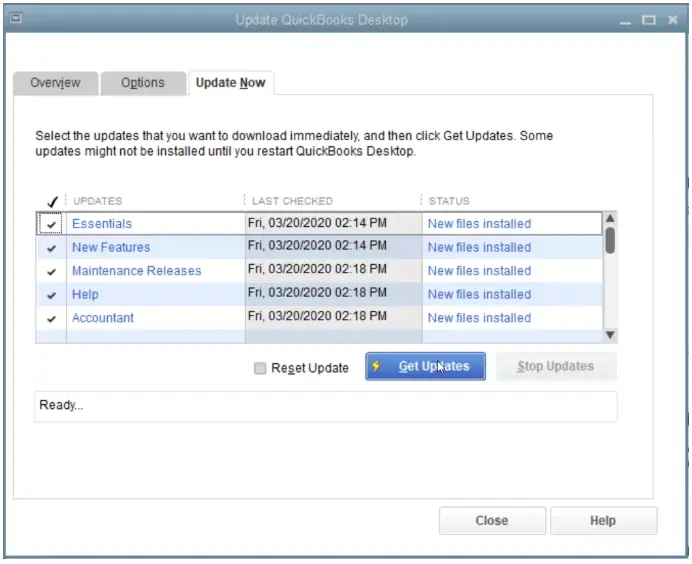
- After this, browse to the Help menu > Update QuickBooks Desktop > Update Now > Get Updates > Close > File > Exit button.
- You are supposed to relaunch your QuickBooks Desktop application.
3. Examine Your Total Targets
Now, you need to check your total targets. To do so, launch the Product Information window by pressing the Ctrl + 1 in the QuickBooks Desktop. As a result, you will see your number of targets listed within the File Information section. However, if you spot that, the target is above 700,000 for the Canada edition and above 500,000 for the UK and South Africa. In that scenario, you are all set to do the list and balance conversion.
4. Exporting of Your Reports and Lists
Before you migrate the data, it is important to export the reports and lists, as it will save you time spent on setting up items from your list individually in the QBO application. Go through the following process to export your reports and lists from the QBDT company file.
- First of all, launch the QuickBooks Desktop application, move to the Reports menu, and click Reports Centre.
- After this, locate and launch any report on your device.
- Pick the appropriate date range and then hit the Excel option from the toolbar. Apart from this, you can also go for the Print or Email option to save the report in PDF form.
- You have to choose the Create New Worksheet option to establish a new Excel workbook or to update the previous workbook. Later on, hit the highlighted Update Existing Worksheet.
- Now, pick the Export option and search for your workbook on your device.
- For instance, if you spot the column that shows that your report consists of multiple columns, browse to the Advanced option. Also, you must select the checkbox of “Space between columns” and then click OK.
- At the end, once everything is fine, tap the OK button.
5. Construct a Brand New QuickBooks Online Account
Now, the users have to prepare a QuickBooks Online subscription to initiate the data migration process. Moreover, the users have to thoroughly review the list of options to pick the appropriate plan and the system requirements to run QuickBooks Online smoothly. If you are asked to login, make use of the exact login details you used for QuickBooks Desktop.
Instructions You Must Follow While Data Migration to QuickBooks Online
The users can easily export their QuickBooks Desktop files to QuickBooks Online. Go through the steps written below according to the edition of QuickBooks Desktop that you are presently using.
For the QuickBooks Desktop Pro or Premier Users
- In the beginning, you are supposed to sign in with the administrative credentials to the data file that you wish to import into QuickBooks Desktop.
- Browse to the Company menu and opt for the Export Company File to QuickBooks Online option.
- Now, choose the highlighted Get Started option followed by Select Destination.
- Finally, you are required to log in to your QuickBooks Online account.
For the QuickBooks Desktop Enterprise Users
- Begin the process by signing in as an admin into the data file that you wish to import into QuickBooks Desktop.
- After this, open the Product Information window on your screen.
- In the meanwhile, the Product Information window opens, hit the Ctrl + B + Q keys together. Later on, hit the OK button from the middle of the page to start the migration process.
Shifting Off the List
Now, it is crucial to import the lists that you have transferred already from the QuickBooks Desktop to Online. Also, you must remember that every list in the QuickBooks migrating services has a different set of instructions, so you need to apply accordingly.
Setting Up of Inventory
The users also have the option to enable the inventory tracking feature in QuickBooks Online. To do so, you must carry on with the instructions below.
- Initially, move to the Settings menu and hit the highlighted Account and Settings option.
- Afterward, navigate to the Sales option and opt for the Edit menu from the Products and Services section.
- You are supposed to switch on the Show Product/Service column from the Sales Forms.
- Enabling both “Track Quantity and Price/Rate” and “Track Inventory Quantity on hand “ is now mandatory.
- End the process by hitting the Save and Done option.
What to Do After QuickBooks Data Migration Desktop to Online?
The users must still carry on with certain steps before using the QuickBooks Online application. For that, you must review the following checklist after migration to ensure that all the data has been exported successfully.
1. Compare the Reports to Verify Your Data
You are supposed to review that these reports both exist in QuickBooks Desktop and QuickBooks Online.
- Balance Sheet Reports
- Sales Tax Summary Report for the latest period
- Customer Balance Summary- All Dates
- Any other reports you wish to review
- Trial Balance- All Dates
- Supplier Balance Summary
However, to check the reports, you are supposed to run the reports by “All Dates” and then apply the Accounting method.
2. Re-Check the Company Settings
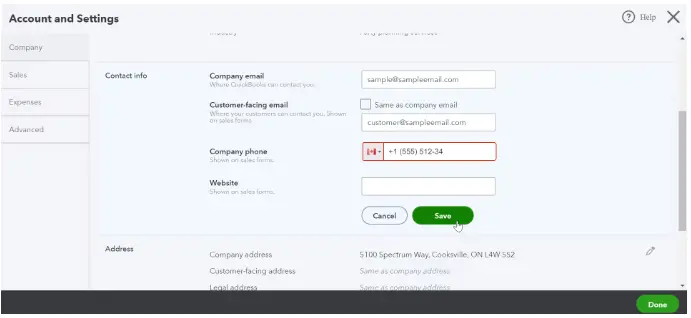
- Firstly, navigate to the Settings menu and choose the Account and Settings option.
- You are supposed to mention your company along with the contact details.
- Also, the email address where you need to receive the monthly invoices from Intuit for the QuickBooks Online subscription must be included in the Company Email box.
- However, if you don’t wish to access the company file email address for your customers to reach you, you can add the address within the customer-facing email box.
- At last, hit the Save button.
3. Change the Settings of Sales Tax
The users must ensure that the QuickBooks Online application is set up with a reliable CRA Business Number and Filing frequency. However, you may skip this option if your company isn’t registered for the sales tax.
4. Linking Of your Bank and Credit Card Accounts
To link your bank account, go to Bookkeeping> Transactions > Bank Transaction > Connect Account. After this, you must look for your bank and enter the login details accurately. You must pick the account you wish to link, choose the date range, and then use the Connect option.
5. Clearing Up Of Bank Reconciliations
As the users haven’t conducted the bank reconciliation so far in QBO, it automatically considers that no bank transactions have been reconciled. So, in that case, you are supposed to inform QuickBooks to select all the transactions till the conversion date.
For clearing up, go to Settings, click Reconcile, and pick the bank account from the list of options. You must add details like Ending Balance Ending Date and then hit Reconcile Now. Pick all the transactions from the list and unmark those checkboxes next to those still not clear. When you spot that the difference between the transactions is zero, it states you are done with reconciliation.
6. Connecting the Payments and Credits With Open Invoices
As the transactions associated with QuickBooks Online don’t connect the invoices with their payments, it will represent a zero balance in the Accounts Receivable and Payable reports. All you can do is connect your credit card and payments with the open invoices by enabling the automatically applied credit card.
7. Go Through the Accounts Detail Type
QuickBooks Online manages the sub-account hierarchy once the conversion is done through the QuickBooks Migration Tool. Moreover, it also applies the special level of account labeled as Detail Type. After this, the conversion process assigns the detail type to the accounts. However, if the detail type isn’t properly mentioned, the conversion process allows a general detail type.
8. Winding Up Of the Payroll Setup Process
You can only convert the transactions and payroll accounts to balance your books of accounts accurately. But, the details beside the payroll, including employee year-to-date numbers, can’t be converted. Furthermore, use the steps below to accomplish the payroll setup procedure.
- Firstly, move to Payroll > Employees and then ensure that every employee that shifts to pay cheque this year is marked Yes.
- On the other hand, if the employee still has not received the payment in the current year, it will automatically be marked No.
- You must go through the Year-to-Date Payroll total along with the employee details.
- End the process by completing the payroll setup using the steps displayed on the screen.
Summarizing The Above!!!!
Through this post’s help, we have covered everything that is required to use the QuickBooks Data Migration Services. However, if you are still struggling while migrating the data, then you must consult with our professionals at +1-833-460-2030 for a quick resolution. They will offer you some useful tips to figure out the issue in the shortest time possible.
Frequently Asked Questions
It is too easy. For now, if you are using Excel to manage your accounts and finances, don’t worry; QuickBooks can easily import those files, enabling you to track your finances much better.
You can directly import your bank statement from your bank in QuickBooks. CSV files are another source that you can import, and they can be of any data like sales or purchase invoices, tax numbers, details of customers, partners, employees, and the data of your accounts and the products you sell.
Yes, you can upload multiple or several files to the ID you are using, and you just need to upload it at once at a time.
QuickBooks Data Migration is a process to transfer your files from one accounting software to another. You can switch from any other application to QuickBooks due to file size increases or changing QuickBooks versions.
The time it takes to complete the QuickBooks Data Migration process depends entirely on the amount and type of migrated data. However, if you migrate, the large amount of data occupies more time during the migration. Sometimes, the process of migration may take months to complete.
You must ensure that your bank statement data is in a format such as CSV, QFX, QBO, or OFX. However, numerous banking platforms enable users to download statement data into CSV format.
Using the QuickBooks Data Migration Services, users can easily transfer from the previous version of QuickBooks to the latest one. You can also shift from QuickBooks Desktop to Online. Apart from this, it also helps the users to migrate into QuickBooks from any other accounting software.
Go through the following procedure to get the QuickBooks Data Migration Tool download.
- Initially, you must launch a preferred web browser to sign in to the QuickBooks Online application.
- Afterward, navigate to the Get Started button from the Export Overview screen.
- Next, to obtain the migration utility, choose the highlighted Download Tool button.
Eventually, you will see that the QuickBooks Data Migration Tool gets downloaded.
Following are the issues that the users might face while trying to convert QuickBooks Desktop to Online 2023.
- It could be possible that the QuickBooks version installed on your device isn’t compatible with migrated files.
- There might be the possibility that the users don’t have enough admin rights.
In other instances, it may happen due to inappropriate Windows Operating system settings.
The users must ensure that their system is compatible to run the QuickBooks Online application. Also, you must check that your computer remains connected with a stable internet connection while transferring data from QuickBooks Desktop Pro 2023 to QuickBooks Online.