Email is an integral part of any business, and QuickBooks understands that. That’s why QuickBooks offers an email feature that allows users to send and receive emails directly from within the software. However, sometimes users may encounter email issues in QuickBooks while using the email feature in QuickBooks Software.
In this article, we will discuss the common email issues in QuickBooks users face and provide tips and tricks to troubleshoot these problems.
Common Email Issues in QuickBooks
- QuickBooks unable to send email
- Emails stuck in the outbox
- Unable to receive emails
- Email password issues
- Incorrect email settings
QuickBooks Services
Accept credit card payments where you do business – in the back office, in your retail store, on your website, or on your mobile device.

What instigates Email Issues in QuickBooks Desktop?
Why Can I Not Send Emails From QuickBooks? | Unable To Send Email From QuickBooks
There are a couple of factors that might lead to outlook crashing when sending Invoice Emails issues, a few of them are highlighted below:
- Incorrect Email Settings.
- .dll file has been corrupted.
- QuickBooks is running as an administrator.
- Damaged or improper QuickBooks Installation.
- A particular domain is blocked.
- Errors while installing Outlook application on Windows.
- While sending emails through QuickBooks, Outlook opens up in the background.
Best Troubleshooting Methods to Eradicate Email Issues in QuickBooks Desktop!
At times, something goes wrong with QuickBooks, and it prevents you from sending your important emails. No worries, just check out the steps highlighted below to tackle such email-related issues in a few mouse clicks.
Method 1: Edit Admin Privileges
Ensure that QuickBooks isn’t set to automatically run as an administrator. Let’s see how:
- The very first step is to shut down the QuickBooks Desktop.
- Now, open the Windows Start menu.
- You have to write down QuickBooks into the search bar and hit right-click on the QuickBooks icon then tap on Open file location.
- In the folder, click right on the QuickBooks.exe file and select Properties.
- After this, hit the Compatibility tab.
- Next, choose to uncheck the Run this program as Administrator option. In case the option is grayed out, tap on Show Settings for All Users. This will make the option accessible.
- To finish, click on Apply and then press OK.
Method 2: Make sure that Email Preferences are Correctly Set in QuickBooks
- Initially, open the QuickBooks Desktop software and go to the Edit menu then choose Preferences. If you use Microsoft Outlook with Microsoft Exchange Server, open and log in to Outlook before you proceed.
- Now, tap on Send Forms from the menu.
- After this, navigate to the My Preferences tab and choose Outlook Email if you use Outlook to send emails.
- Press OK.
Send a test email from QuickBooks. If you still experience an error, select your preferences.
- Head to the Edit menu and then choose Preferences.
- Next, select Send Forms from the menu and then hit the My Preferences tab.
- Click on QuickBooks E-mail or Webmail, and then press OK. This toggles your preference off.
- Afterward, repeat the same steps and return to the My Preferences tab then choose Outlook.
- Once done, tap on OK.
- You must close QuickBooks and all other running programs.
- To end the process, restart your system.
Method 3: Verify your Internet Explorer Email Preferences
QuickBooks software makes use of Internet Explorer to run web services running in the background. You may have to reset your email preferences there. Here’s how:
- At first, close the QuickBooks software.
- Now, open Internet Explorer.
- Choose Tools and the Settings menu then tap on Internet options.
- Thereafter, hit the Programs tab and then select Set Programs.
- Click on Set your default programs and then opt for the email service you wish to use.
- Tap on Apply and then press OK.
- Last but not least, make an exit from Internet Explorer.
Method 4: Test and repair MAPI32.dll
This step may be a bit complicated if you’re a confident computer user then carry out the steps enumerated below. Else reach out to the IT Professional for getting better assistance.
Run the test to narrow down the issue
- In the beginning, restart your system.
- Now, you need to open Microsoft Word and generate a new document.
- Choose the File and tap on Send, then Email as PDF Attachment.
In case you are able to send an email from Microsoft Word but not from QuickBooks, carry out the steps to repair your MAPI32.dll file:
- You are required to close all running programs.
- Now, open the Windows Start menu.
- Type File Explorer into the search bar and then open it.
- After this, navigate to C:\Windows\System32 under Search Programs and Files then click Enter on your keyboard.
- Locate and open Fixmapi.exe file and follow the on-screen instructions to repair the file.
- Once the file is repaired, restart your system and try sending the email one more time.
Method 5: Reinstall QuickBooks Desktop using Clean Install Tool
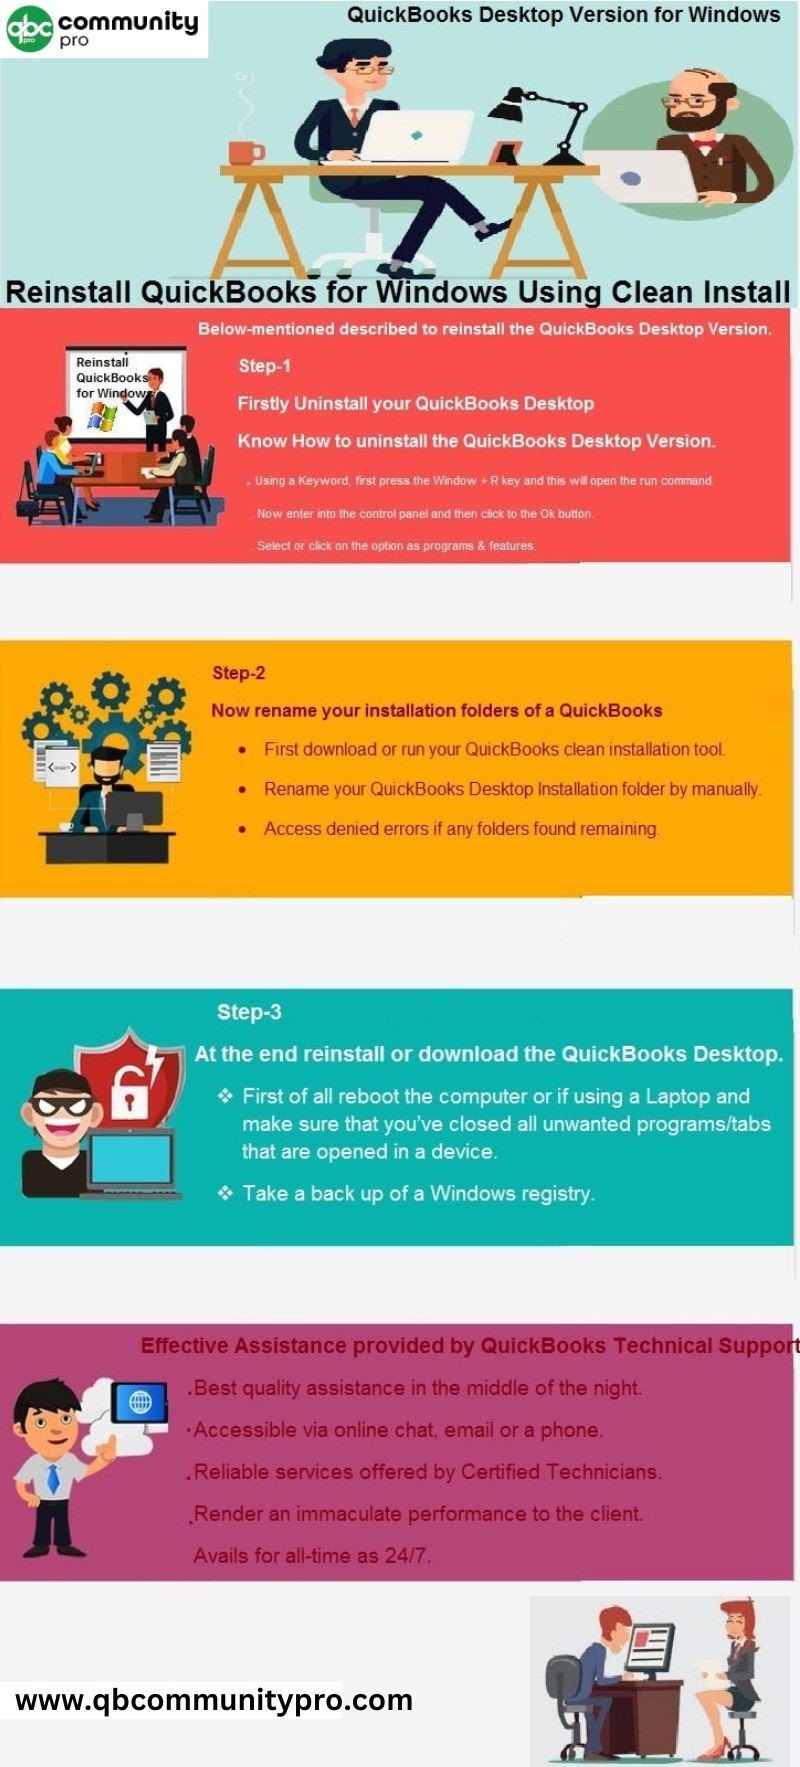
- To begin with, close all open web pages and applications once save all unfinished work.
- Now, hit the Start button and then type Task Manager.
- Once the Task Manager window opens up, end all the QuickBooks-related processes.
- After this, make use of the Clean Install Tool to rename all the QuickBooks applications and program files.
- Then, restart your system.
- You must look for unnamed folders and then manually rename them.
- Uninstall QuickBooks accounting software and then reboot your system.
- Make sure to keep your license and Product Number handy.
- You must insert the installation disk into the disc drive of your PC or download an installation source copy from the internet.
- Next, run the installation wizard and then follow the instructions appearing on your screen.
- Open QuickBooks and then reactivate your program.
- Move to the Help menu and update your QuickBooks desktop.
- In the end, run your QuickBooks company file and try sending the email.
Method 6: Fix Microsoft Outlook-related Issues
- Herein, you are supposed to head to the Windows in the System, and then open the Control Panel.
- Now, choose the Programs option.
- Tap on the Programs once again and select Uninstall a program.
- Afterward, you have to locate and opt for the Microsoft outlook program from the list that displays on the screen.
- Once done, hit the Repair tab and tap on the Uninstall/Change option in the uninstall wizard.
- Go through the instructions to fix the MS Outlook program.
- Then, press the Finish button.
- When the process comes to an end, try to send an email from QuickBooks to Outlook and check if the issue is resolved or not.
Most Reliable Solutions to Fix Webmail Password Issues in QuickBooks Desktop!
If you receive a notification about an incorrect email or password, don’t panic. Here’s what to check so not any block messages go out to your vendors and customers. Let’s have a look:
Solution 1: Update QuickBooks
- At first, navigate to the Help menu and choose Update QuickBooks Desktop.
- Tap on Update Now and then click Get Updates.
- When the update is over, close and reopen QuickBooks.
- Press Yes if you’re prompted to install the update.
- Once the installation is completed successfully, follow the instructions displayed on your screen.
Solution 2: Check your email settings
If the above solution didn’t work out, open your online email service and review your settings and filter preferences. These may inadvertently block the emails from QuickBooks.
To verify the email settings, you need to carry out the steps presented below.
For Gmail Users
You must check the app preferences. It should be noticeable that something may block the connection to your Google account. Below are the steps you are supposed to check out:
- You must perform the steps for enabling access to QuickBooks Gmail less secure apps.
- Now, set access preferences for certain applications, like QuickBooks Desktop.
- Thereafter, go back to your QuickBooks Desktop software and then email a test transaction to yourself.
If you still find issues while sending emails, you have to turn off the 2-Step Verification feature for your Gmail account. It is imperative to note that this turns it off for all apps, not just QuickBooks.
For Yahoo! Mail Users
The steps for the Yahoo! Mail users are different as it uses a 2-Step Verification process. Go through the below-listed pointers to review your security settings.
- Navigate to your Yahoo Account Security page.
- After this, turn on the Two-step verification and Allow apps that use the less secure log-in features.
- Then, return to QuickBooks and email a test transaction to yourself.
If you’re still unable to send emails, use Yahoo’s generate third-party app passwords tool. This tool will create some random passwords you can use to connect QuickBooks and you only need to do this once. Also, remember that in case you’re sending batch emails, the password will expire once you’re done with sending 12 invoices or transactions. Then, you are recommended to generate a new third-party app password to continue.
- Go through the steps to get a password.
- Then, move back to QuickBooks and email a test transaction to yourself.
- Under the Password field box, enter the third-party app password and then press OK.
Note: It is a remarkable point that to send emails to QuickBooks, Yahoo mail powered creates a secure mail key when you send emails through the third-party desktop app as its new feature.
Other Email Services (Hotmail, AOL, etc.)
If you’re going to use other email services, ensure to verify the security and filter settings and also make exceptions or rules so QuickBooks isn’t blocked.
QuickBooks in Right Networks
You have to complete a Multi-Factor Authentication request with RightNetworks. If you can’t log in to RightNetworks from a browser, contact them for help to set up it properly.
Solution 3: Verify your Antivirus settings
Sometimes, the antivirus software may accidentally block the connection to QuickBooks and thus restrict its seamless functioning. In such a scenario, you have to search for the antivirus provider’s website and head to the steps to Allow the Port Exceptions. The steps for Norton and McAfee are stated below:
- Create Port 465 open for Yahoo! Mail.
- Also, create Port 587 open for Gmail and all other email services.
If you’re a McAfee user, open your antivirus program and look at your Excluded Processes list. You must have to add these names to the list so that they can run freely:
- QBW32.exe – C:\Program Files\Intuit\QuickBooks [year]\QBW32.exe.
- QBDBMGRN.exe – C:\Program Files\Intuit\QuickBooks [year]\QBDBMgrN.exe.
- QBDBMGR.exe – C:\Program Files\Intuit\QuickBooks [year]\QBDBMgr.exe.
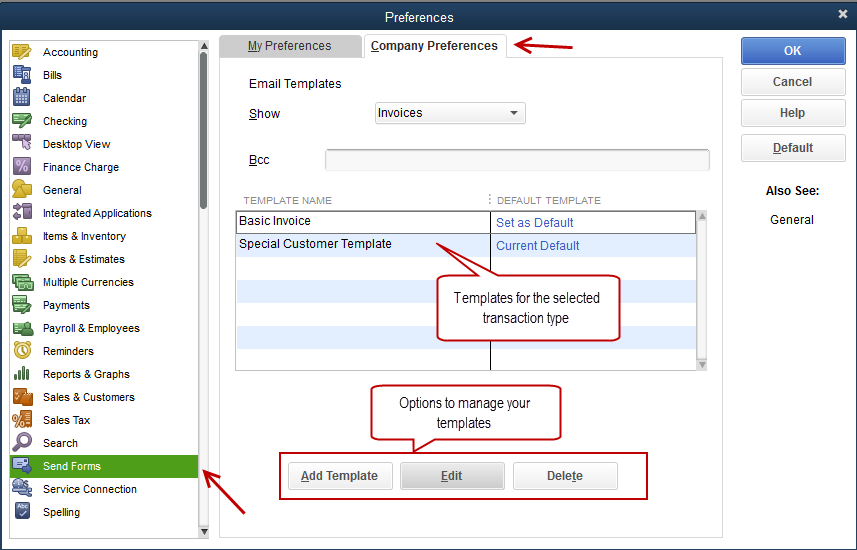
Easy Steps on How do I Change to Default Email I sent my Invoices from!
If you want to set your email address as a new company email, then yes, it’ll update on the invoice. Once you sent an invoice to your customer, the address will have appeared on the invoice form. Below some easy-to-follow instructions are provided to switch from your older default email to a newer mail. Here’s how:
- First of all, open QuickBooks.
- Now, click the Edit button.
- Select the Preferences tab.
- After this, choose the Send Forms option.
- Hit the Company Preferences tab.
- Tap on Add Template.
- Here, you have to enter the name of the template in the given field.
- Furthermore, change the subject of the email as per your requirement.
- Also, edit the context of the email you want to create.
- Lastly, press the Save button.
Two Different Ways to Fix Custom Email Template issues in QuickBooks Desktop!
If you created a new email template and sent emails but QuickBooks is still using your old template, no worries as it often happens due to email issues in QuickBooks Desktop. Below are the two ways to apply for a new template. Let’s have a look:
Way 1: Copy and paste the correct message prior to sending the email
- To start off, navigate to the Edit menu and choose Preferences.
- Now, click on the Send Forms menu and then hit the Company Preferences tab.
- You need to highlight the template you wish to use and tap on Edit.
- Once done, copy the message Body text.
- Then, head to the File menu and select Send Forms.
- After this, opt for the email you want to send and then press Ctrl + V to paste the copied text into the body section. Remember that If you’re using QuickBooks Desktop Enterprise, you have to choose the Edit Email first.
- At last, hit the Send Now icon.
Way 2: Reset the email later settings
- In the inception, you are required to locate and open the Transaction you want to send.
- Next, make sure you uncheck the Email Later box and then tap on Save & Close.
- Afterward, reopen the transaction and also choose to Check the Email later box.
- The final step is to hit Save & Close and you are good to go.
Emails to Customers are Blank
The emails you sent to your customers are totally blank? To get over this, you need to run the QuickBooks Print & Print Repair Tool from the QuickBooks Tool Hub. This will help you to fix certain minor email issues in your company file. Let’s see how:
- In the starting, close the QuickBooks software.
- Now, you need to download the latest QuickBooks Tool Hub version and then save the file somewhere you can easily access it.
- Open the file you downloaded with an extension QuickBooksToolHub.exe.
- You must follow the on-screen prompts to install and agree to the terms and conditions.
- When the installation is done, click twice on your Windows desktop icon to open the tool hub.
Bottom Line!
Are you still coming across Email issues in QuickBooks? Stop getting worried about it as our QuickBooks representatives are here to assist you when you’re in need. It’s not so surprising to bump into different email-related errors while trying to send invoices, letters, or promotional emails to your customers. However, if you find yourself on the same track then feel free to contact us to get your problem resolved at the earliest.