The businesses must file the W-2 and W-3 forms with the Social Security Administration at the end of each calendar year. The Form W-2 is a wage and Tax statement sent to every employee by the employer and the IRS at the end of the year. Form W-3 is the tax form employers mainly use to file employee income to the IRS and Social Security Administration. However, employers can also print W-2 and W-3 Forms in QuickBooks and send their copies to the employees.
To gather more details about the filing and printing of these forms, read this post thoroughly. Thus, it will help you file state and federal taxes with the IRS smoothly without any issues.
Didn’t have any proper guidance to print W-2 and W-3 forms in QuickBooks and need quick assistance? Ring us at +1-888-209-3999 and have a conversation with our professionals to receive the best guidance within the shortest time applicable.
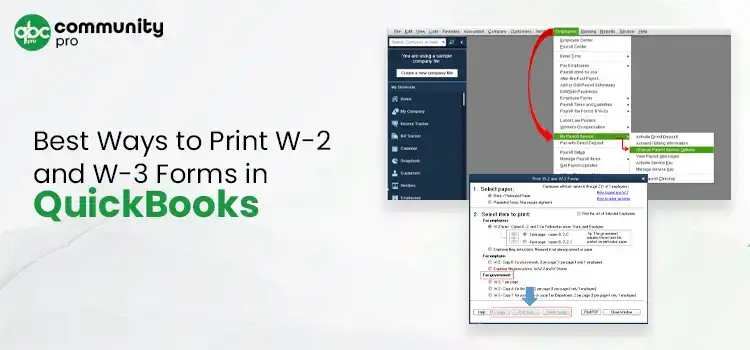
Print Your W-2 and W-3 Forms in QuickBooks Applying These Simple Steps
Printing your W-2 form in QuickBooks is important when you have to send copies to your employees to maintain your records. Conversely, a W-3 form in QuickBooks is required to send to the accountants. Furthermore, review the procedure below to print your W-2 and W-3 forms in QuickBooks.
Stage 1: Purchase the W-2 Paper (If Possible)-
For instance, if your employee has lost or doesn’t have the original W-2 form or requires a copy, you can print it on plain paper and move to the next step. Conversely, if you print from QuickBooks and want to mail official copies to the employees, you must get the W-2 paper. For this, you must perform the instructions outlined below.
- Reach the QuickBooks Checks & Supplies page using your preferred web browser.
- After this, navigate to the Tax Products option and hit Blank W-2 kits.
- Furthermore, act according to the instructions on the screen to wind up the order.
- For the users of QuickBooks Online Payroll or QuickBooks Desktop Payroll Enhanced or Standard, you must need at least 3-4 parts of perforated paper.
- Meanwhile, you require four parts of perforated paper for the QuickBooks Desktop Payroll Assistant.
Read More- How To Reprint W2 Forms In QuickBooks Desktop & Online?
Stage 2: Commence With the Printing of W-2s and W-3 Forms
To begin the process, you must pick the product according to your preference to print your W-2s and W-3 forms.
Print W-2 and W-3 forms in QuickBooks Online Payroll.
The users can easily print their W-2 forms in QuickBooks on or after the dates below.
- In case your automated taxes and forms settings are disabled, then you can print on or after Jan 1.
- If your automated taxes and forms settings are enabled, you can print on or after Jan 15.
Steps to Print Current Year or 1 Year Earlier
- Begin the process by choosing the Taxes option followed by Payroll Tax.
- After that, browse to the Filings option > Resources > W-2s.
- You must thoroughly read the list of employees selected for the printed copy.
- The users must know that the W-2 form isn’t printed for the employees, which goes with the paperless option. In that case, they can print the form via QuickBooks Workforce if it is mandatory.
- If your automated taxes and forms settings are disabled, you must go through your Form W-2 print setting option. After this, opt for the Change Setting option to change the paper type if required.
- Thereon, hit the View or Manage option on the copy that you require
- W-3 Summary Transmittal of Wage and Tax Statements.
- W-2, Copies A & D (employer)
- W-2, Copies B, C & 2 (employer)
- Afterwards, choose the highlighted View and Print options and then pick the Print icon from the Adobe Reader toolbar, followed by the Print option.
Note:- For instance, if you are printing the W-2 or W-3 form again if your employee has lost the form, you must include REISSUED STATEMENT on the top. Moreover, you also have to add a copy of the W-2 instructions along with it.
Steps for Printing the Forms For Prior Years
- Choose the Taxes > Payroll Tax > Filings > Resources > Archived forms and filings option to print the prior years’ forms.
- After this, you must pick the date range according to your preference. Otherwise, you can also search for the forms you require directly.
- Thereon hit the View on the W-2 or W-3 form you wish to print and then move further.
- To accomplish the process, tap the Print icon from the Reader toolbar and click the Print option again.
Print W-2 and W-3 forms in QuickBooks Desktop Payroll Assisted
The employers can print their W-2 forms in QuickBooks Desktop Payroll Assisted at the start of Jan 10. However, if you opt for Intuit Print, you are only required to print the W-2 form when the employee has lost or didn’t obtain the original copy.
- To start, choose the Employees menu and click Payroll Center > File Forms tab > View/Print Forms & W-2s.
- You must include the Payroll PIN accurately in the search column and hit the OK button.
- Now, tap the W-2s tab, pick the year, and then choose all or individual employees according to your requirements.
- Afterwards, choose the Open/Save Selected button and choose the valid reason for printing the W-2s form.
- Finally, click on the File menu on the Adobe Reader and hit the Print option.
Print W-2 and W-3 forms in QuickBooks Desktop Payroll Enhanced and Standard.
The users can print their W-2s form on or after Jan 1. Use the steps below to print the QuickBooks Desktop Payroll Enhanced and Standard Edition forms.
- Before proceeding further, confirm that you have updated QuickBooks and the QB payroll tax table to the recently launched version.
- Afterwards, go to the Employee drop-down menu and pick the Payroll Tax Forms & W-2s > Process Payroll Forms.
- In the next step, browse to the File Forms tab and choose the Annual Form W-2/W-3 – Wage and Tax Statement/Transmittal.
- You must navigate to the Create Form option and pick all or individual employees to file.
- The users have to mention the year appropriately and hit the OK button.
- Following this, click All or Individual Employees to print and go with the Review/Edit option to go through every W-2 form. Every W-2 form that is reviewed shows the checkmark in the Reviewed column.
- Once everything is okay, opt for the Submit Form button and go through the steps to print and file the forms.
Here’s How to file your W-2 and W-3 forms in QuickBooks Desktop
Before filing your W-2 and W-3 forms in QuickBooks Desktop Payroll Enhanced, ensure you have the following.
- The users must have an active and valid QuickBooks Desktop Payroll Enhanced Account.
- Moreover, you must also have the correct Federal Employer Identification Number (EIN).
- You require a W-2 paper to print the form. Alternatively, you may also use blank 3-part or 4-part perforated paper.
- Apart from this, it also requires your valid phone number and email address associated with QuickBooks.
Procedure to file the W-2 and W-3 Forms
- To begin the process, you must set up your tax filing method. For this, choose the Payroll Tax Forms and W-2s followed by the Process Payroll Forms option.
- After this, navigate to the Other Activities list and pick the Manage Filing Methods.
- Thereon, go with the Filing Methods, opt for Federal Form W-2/W-3, and hit the Edit button.
- You must pick the appropriate filing method, e-file, or print and mail option. Then, hit the Finish button to end the process.
Note: The users don’t have to enroll with the Social Security Administration to e-file the W-2 and W-3 forms.
- To file the W-2 form, browse the Employees menu and opt for the Payroll Tax Forms and W-2s.
- After this, choose the Process Payroll Forms option and hit the Annual Form W-2/W-3 Wage and Tax Statement Transmittal, followed by the Create Form option.
- Thereon, you must pick whether you wish to file the taxes for all or only one specific employee.
- From the Select Employees for W-2/W-3 window, select to review and edit every employee form thoroughly.
- Consequently, you will see a window displaying the list of employees with W-2 forms that were reviewed and printed.
- Following this, hit the Next button to review every part of the W-2 and the W-3 form.
- You must click the Check For Errors tab, redirecting you to the form section needing repair. Herein, you are supposed to resolve all the issues before e-filing.
- Furthermore, go with the Submit to Print or E-file the form option.
- Later on, for printing and mailing the form., choose the Print option. The users can also print the form in PDF format by choosing the Print PDF option.
Read More- How To Fix PDF And Print Problems In QuickBooks Desktop?
Steps to File the W-2s Forms Electronically
To file the W-2 form electronically, pick any of the products listed below.
QuickBooks Online Payroll Users
The users must perform the following steps to e-file the W-2 form electronically.
Stage 1: E-Filing Of Your W-2s Form
- To start the process, you must log in to your QuickBooks Online account.
- After this, choose the Taxes option > Payroll Tax > Filings option.
- Thereon, from the W-2 copies A & D (Employer) section, opt for the File menu.
- You must tap the Annual Forms option followed by W-2 Copies A & D (Employer) and the Continue option.
- Now, if asked, you must tell whether one or more employees are active participants in a retirement plan throughout the tax year.
- From the Employer Copies: Form W2 page, hit the View button to launch the Acrobat Reader.
- The users must review and print Copy D (Employer’s Copy) for your records.
- Furthermore, tap the Submit to Authorize Us for filing copy A of Form W-2 electronically.
After processing the W-2 form, you will get an email telling you the filing is done successfully. However, the users can verify the filing status from the Status page using the following steps.
- Initially, go to the Taxes menu and hit the Payroll Tax button.
- Afterwards, choose the Payroll Forms or Filings option and tap the W-2 form.
Stage 2: Get Your W-2s Forms Printed and Send them to Your Employees
Users must print their W-2 forms using the above procedure and then send them to their employees.
Filing Of Your State W-2 Forms
Users accessing the QuickBooks Online Payroll Core, Premium, or Elite automatically file their state W-2 forms with the Federal W-2. On the other side, follow the steps below while filing the state W-2 form in the QuickBooks Desktop Payroll Enhanced edition.
First Step- Generate Your W-2 Form To Send To your State
Go through the following instructions to prepare the file you will send to the state.
- Firstly, move to the Employees menu > Payroll Tax Forms & W-2s > Create State W-2 E-File option.
- After this, you must hit the Continue button twice and choose the state where you live, followed by the Get QuickBooks Data option.
- Thereon, tap the OK button to resolve errors or include missing details.
- Subsequently, click the Add-Ins tab to search for the QuickBooks Payroll State W-2 drop-down menu. Later on, opt for the Start Interview option.
- Confirm that the checkbox “I understand that I must review my data and answer the following questions” and hit the Next button.
- The users must write down the file name and location and move further.
- Following this, you must provide all the answers to the questions in the interview and thoroughly review any auto-populated info.
- Furthermore, tap the Next button until you reach the End of Interview section.
- Later, opt for the Create W-2 File > OK and click Yes to save the Excel workbook for your records.
Second Step:- Visit Your State Agency Website
To visit the State Agency Website, launch your preferred web browser and access the state agency website. However, check out the Payroll Tax Compliance Links if you need assistance getting your state agency website.
Third Step:- Uploading Of Your State W-2 Form
Once you review the state agency website, go through the following steps to upload your file.
To upload the form in Georgia, North Carolina, North Dakota, Utah, Virginia Or Wisconsin
- First of all, open the QuickBooks application and then navigate to the Employees menu > Payroll Tax Forms & W-2s > Process Payroll Forms.
- After that, move to the File Forms section and pick your state worksheet.
- You must go through the Select Filing Period year and change if you wish to do so.
- Thereon, hit the OK button and complete the W-2 worksheet.
- Later on, tap on the Check For Errors option to ensure everything is correct before you file the form.
- Once you are all set, click on the E-file and add your email address and phone number.
- Conclude the entire process by hitting the Submit button.
For the users staying in California, Lowa, or New York
The users won’t have to file a separate state W-2 form as it is already added to the Federal W-2 file.
For the users staying in Alaska, Florida, New Hampshire, Texas, Washington, or Wyoming
The people don’t have to file any state W-2s form, as the state doesn’t include any withholding taxes.
Read Here- Print Form 1099 and 1096 in QuickBooks Desktop & Online
When is the Best time to File the Form W-3 in QuickBooks?
The best time for filing the W-3 form entirely depends on how you have filed the W-2s Form with the Social Security Administration (SSA).
- In case you have already mailed the W-2 copy A to the SSA, the users have to file the Form W-3 with a copy of the W-2 form. Thereon, the users must fill out the “Get a report that shows my W-3 info” form to obtain the complete details of Form W-3.
- Conversely, if QuickBooks already filed your W-2 form, you won’t have to file the W-3 form.
Conclusion
Through this guide’s help, the users can now easily print W-2 and W-3 forms in QuickBooks without encountering any issues. However, if you find any difficulty doing the same, you can get help from our professionals at +1-888-209-3999 and resolve your issue.
Frequently Asked Questions
To reprint a W-2 form in QuickBooks, have a look at the steps below.
- Firstly, move to the QuickBooks Employees menu and hit the “Payroll Center” option.
- After this, navigate to the Taxes and Forms tab and pick Annual Forms from the Forms section.
- You must pick the relevant employee from the drop-down menu and opt for the “W-2 Copies B, C & 2
Both the W-2 and the W-3 forms are different from one another. The employees file the Form W-2, and the employer completes the W-3 form. Moreover, the employers must file both forms to the IRS and Social Security Administration by Jan 31 every year.
Go through the following steps to get the report displaying W-3 info in QuickBooks Online Payroll.
- In the initial stage, opt for the Business Overview and hit the Reports button.
- After this, you must add Payroll Tax and Wage Summary by clicking the Find Report by name drop-down menu.
- You have to change the date range to This Year and hit the Apply button.
- At last, choose the Share drop-down menu if you wish to save or print the reports.
Yes, the users can email the W-2 forms in QuickBooks in the pressure-sealed format and a secure window envelope.
If the procedure listed above doesn’t help you print W-2 and W-3 form in QuickBooks, you can get help from our QB professionals for quick help.

